Datum Verification: how it saves time and money
What are Datums?
In Metrology datums are the features of a part used to simulate form, fit, and function to mating components. By recognizing features as datums, other features can be measured more effectively. Manufactured parts will go through tuning loops where features are corrected toward lower deviations from the datums. Put simply, datums are the control on the part and everything is fixed according to where they are.
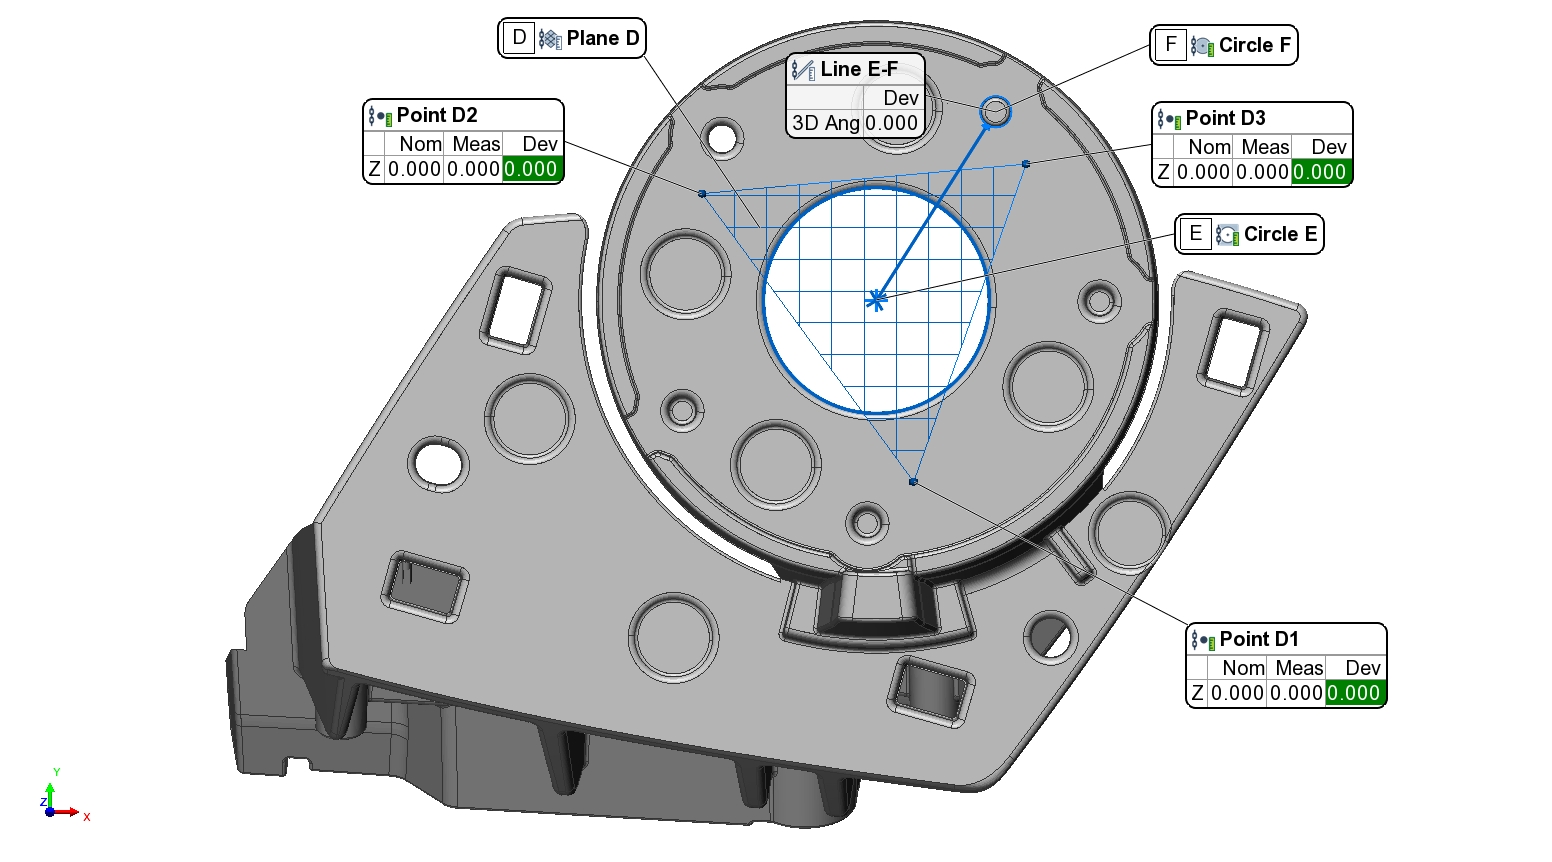
Below is an example of a part that has been aligned to its CAD model using datum features D|E|F. The primary datum is Plane D – the flat surface. This means the part has been leveled to its associated CAD plane the same way the bottom of a coffee cup sits on your desk. Secondary and tertiary datums E & F are also used which would control the location and rotation of said coffee cup. For this exercise the most important bit is that, when comparing the part to CAD, the part is laying perfectly flat on the CAD model’s D plane.

Methods for Datum Verification
The problem is this: just like any feature on a given artifact, datums are susceptible to deviation. Due to how critical datums are to the function and perfection of the part their conditions should be evaluated but often are not. The majority of the work we do at Haven Metrology is assisting organizations by measuring their artifacts according to their specifications. We then offer interpretations for how to best bring features into specification. One best practice we offer, especially for prototypes or first article inspections, is datum verification. Most customers do not know this is an option.
-
- The traditional way of verifying datums is to reference them back to another set of datums. This is only possible on more complex parts that have multiple datum alignments. And can you be sure that this second set of datums is correct?
- Another method is to determine features that cannot be modified in the manufacturing process due to expense, difficulty, or inaccessibility, and measure datums back to these features.
- Using scanning technology like Zeiss’s Comet L3D Blue Light Scanners, of which Haven Metrology has two, we scan the entire part and best fit all of the geometry of the part back to its CAD model.
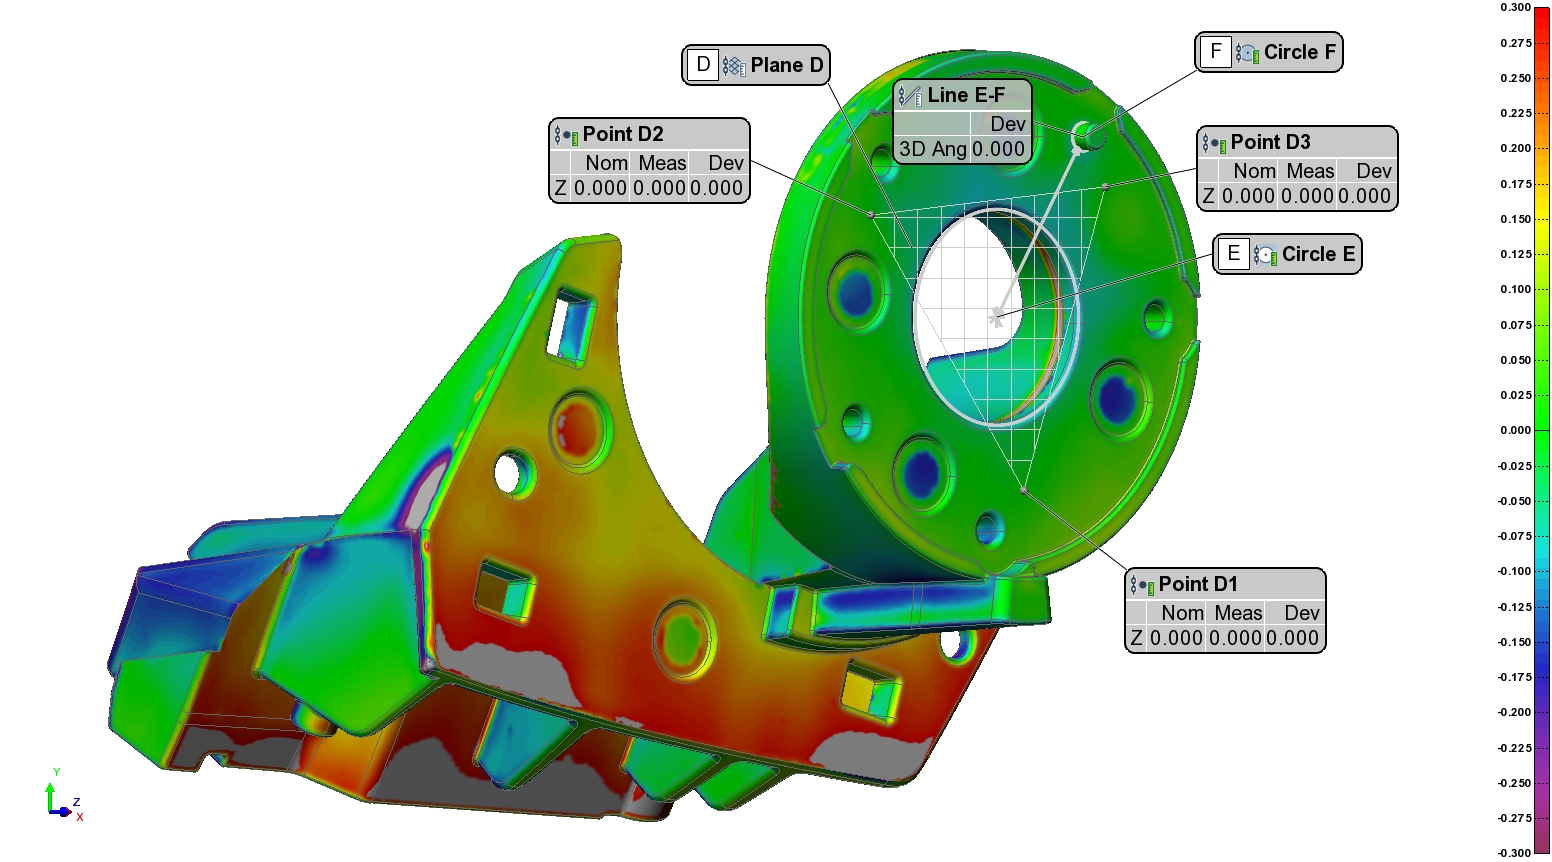
Below is what we call a Profile Overlay. Using one of the functions of PolyWorks software we can map out the deviations of the surfaces on the part. Red shows where there is high material, green shows nominal material, and blue shows where there is less material. Because we aligned the part to the model using datums, all datum features should show green. Based upon the DEF datum alignment, this part has a major issue with high (red) material. Or does it?
DEF Alignment Profile Overlay

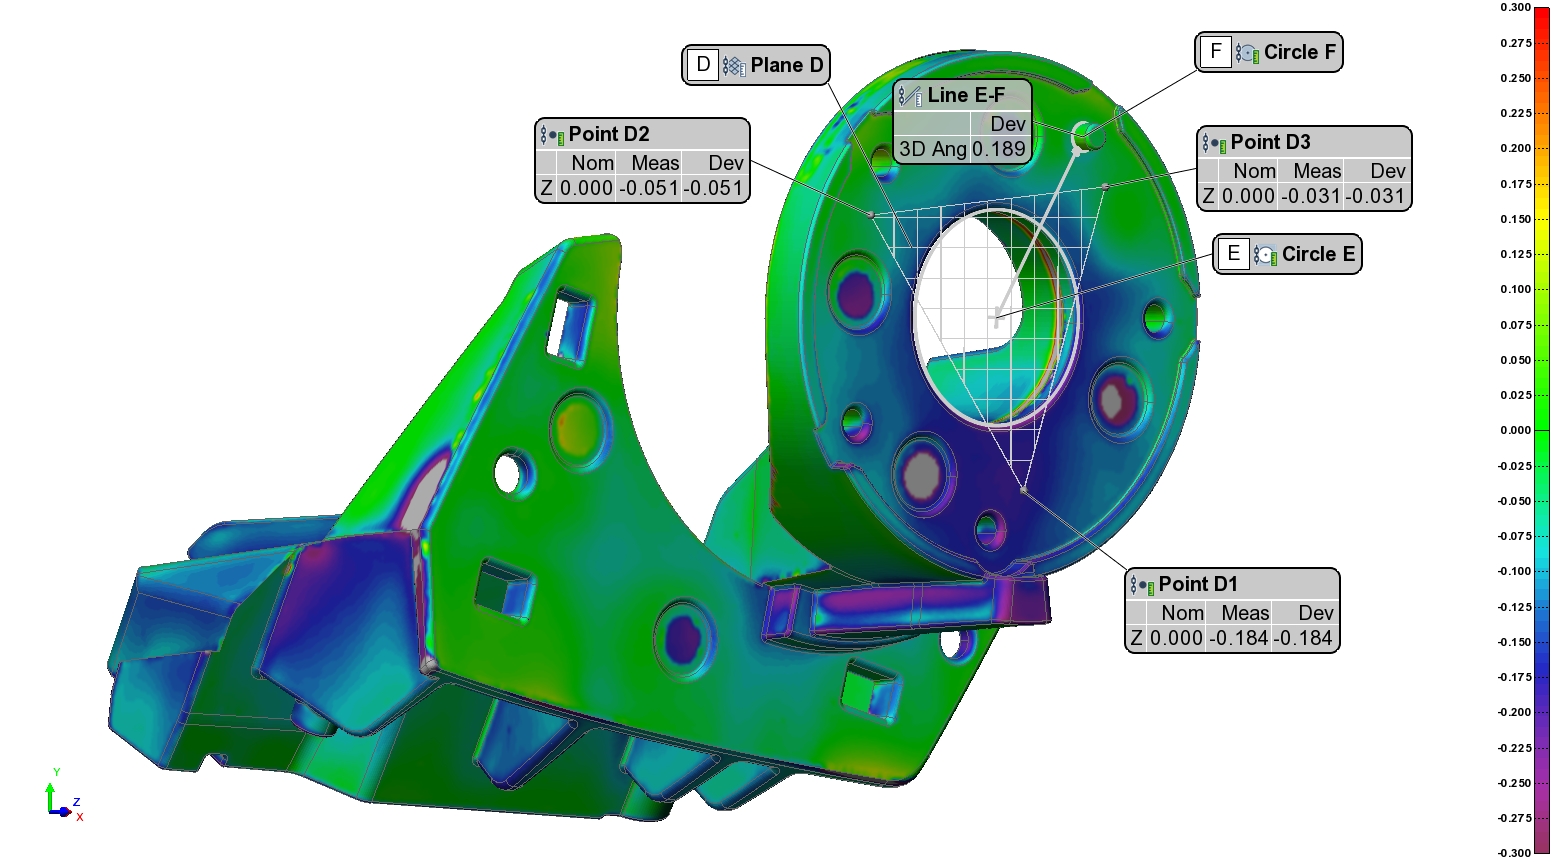
Below is the same part but rather than being aligned to its CAD model using the DEF datum alignment, we’ve used an overall best fit. This means between a couple thousand iterations our software, PolyWorks, has best fit the part to the model by averaging out all deviations. What we learn is this: the part does not have high material. There is negative material of -.184mm on Plane D Point 1. When we level to Plane D for the DEF alignment, we are making effectively turning this -.184mm deviation to zero and skewing the form of the rest of the part.
Best Fit Alignment Profile Overlay

Fixing 10% versus 90% of a part?
The Best Fit scenario indicates that the vast majority of the part form is very good. The primary datum, in relation to the rest of the part form, is bad and skewing the results. Without Datum Verification this would not have been learned and extensive tooling work would be needed to fix things that don’t need to be fixed. Adding +.184mm of material to the Point D1 location addresses many problems.
The difference between Datum Verification services by Haven Metrology for a few hundred dollars and a morning’s worth of time versus many thousands of dollars in tooling changes and months’ worth of headaches seems to be something worth considering.


